Installing Huawei CSI on the CCE or CCE Agile Platform
This section describes how to install Huawei CSI on the CCE or CCE Agile platform.
Creating a Helm Installation Package
The CCE or CCE Agile platform cannot directly install Huawei CSI using Helm. You need to manually create a Helm installation package and upload it to the chart list on the platform for installation.
Use a remote access tool, such as PuTTY, to log in to any node where Helm is deployed through the management IP address.
Copy the helm directory in the Huawei CSI component package to any directory on the node. For details about the Helm tool path, see Table 1 .
Go to the helm working directory.
cd helm/Modify the kubeletConfigDir and csiDriver.driverName parameters in the helm/esdk/values.yaml file.
vi ./esdk/values.yamlModify the following parameters:
# Specify kubelet config dir path.
# kubernetes and openshift is usually /var/lib/kubelet
# Tanzu is usually /var/vcap/data/kubelet
# CCE is usually /mnt/paas/kubernetes/kubelet
kubeletConfigDir: /mnt/paas/kubernetes/kubelet

# The CSI driver parameter configuration
csiDriver:
  # Driver name, it is strongly recommended not to modify this parameter
  # The CCE platform needs to modify this parameter, e.g. csi.oceanstor.com
  driverName: csi.oceanstor.com
Run the following command to create a Helm installation package. This command will generate the installation package to the current path.
helm package ./esdk/ -d ./
Installing Huawei CSI
Use a remote access tool, such as PuTTY, to log in to any master node where the CCE Agile platform is deployed through the management IP address.
Run the following command to create a namespace for deploying Huawei CSI. huawei-csi indicates the custom namespace.
kubectl create namespace huawei-csiExport the Helm installation package. For details, see Creating a Helm Installation Package .
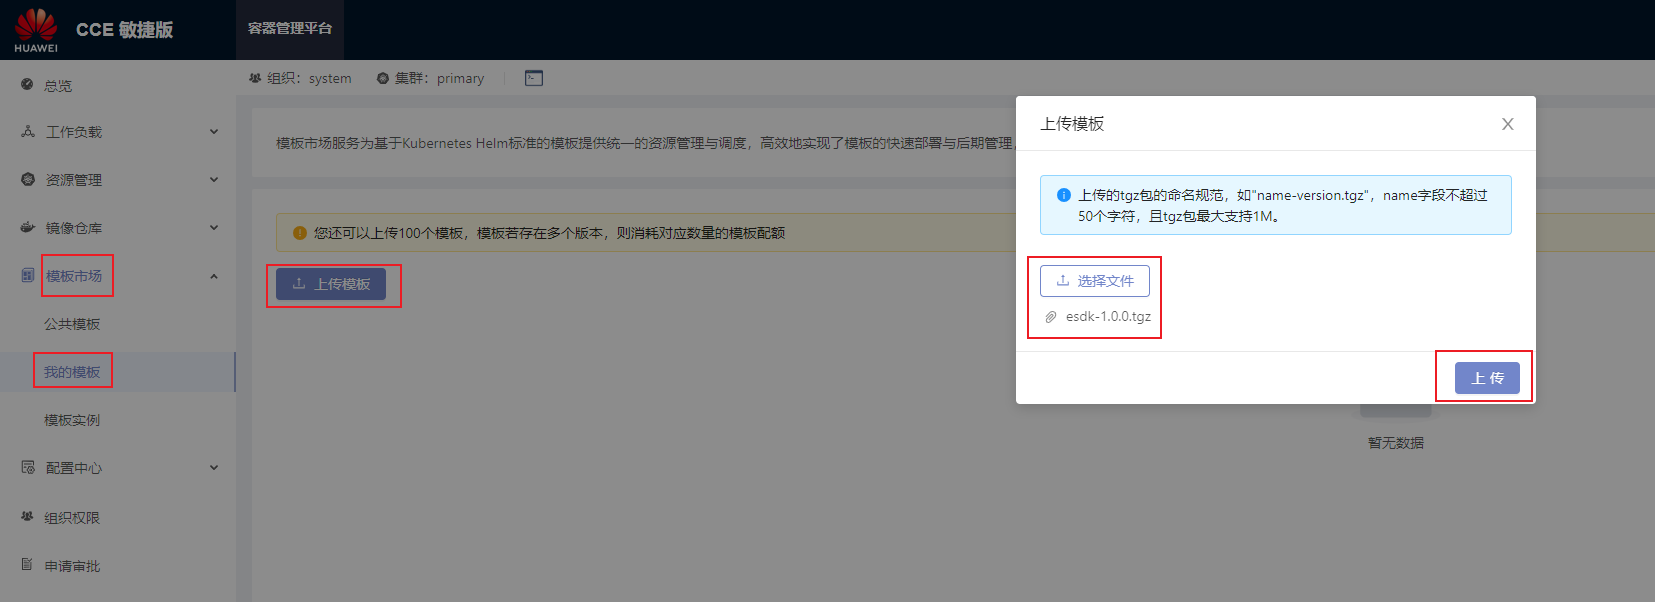
On the home page, choose Charts > My Charts > Upload Chart. The Upload Chart dialog box is displayed. Import the exported Helm installation package to the CCE Agile platform.

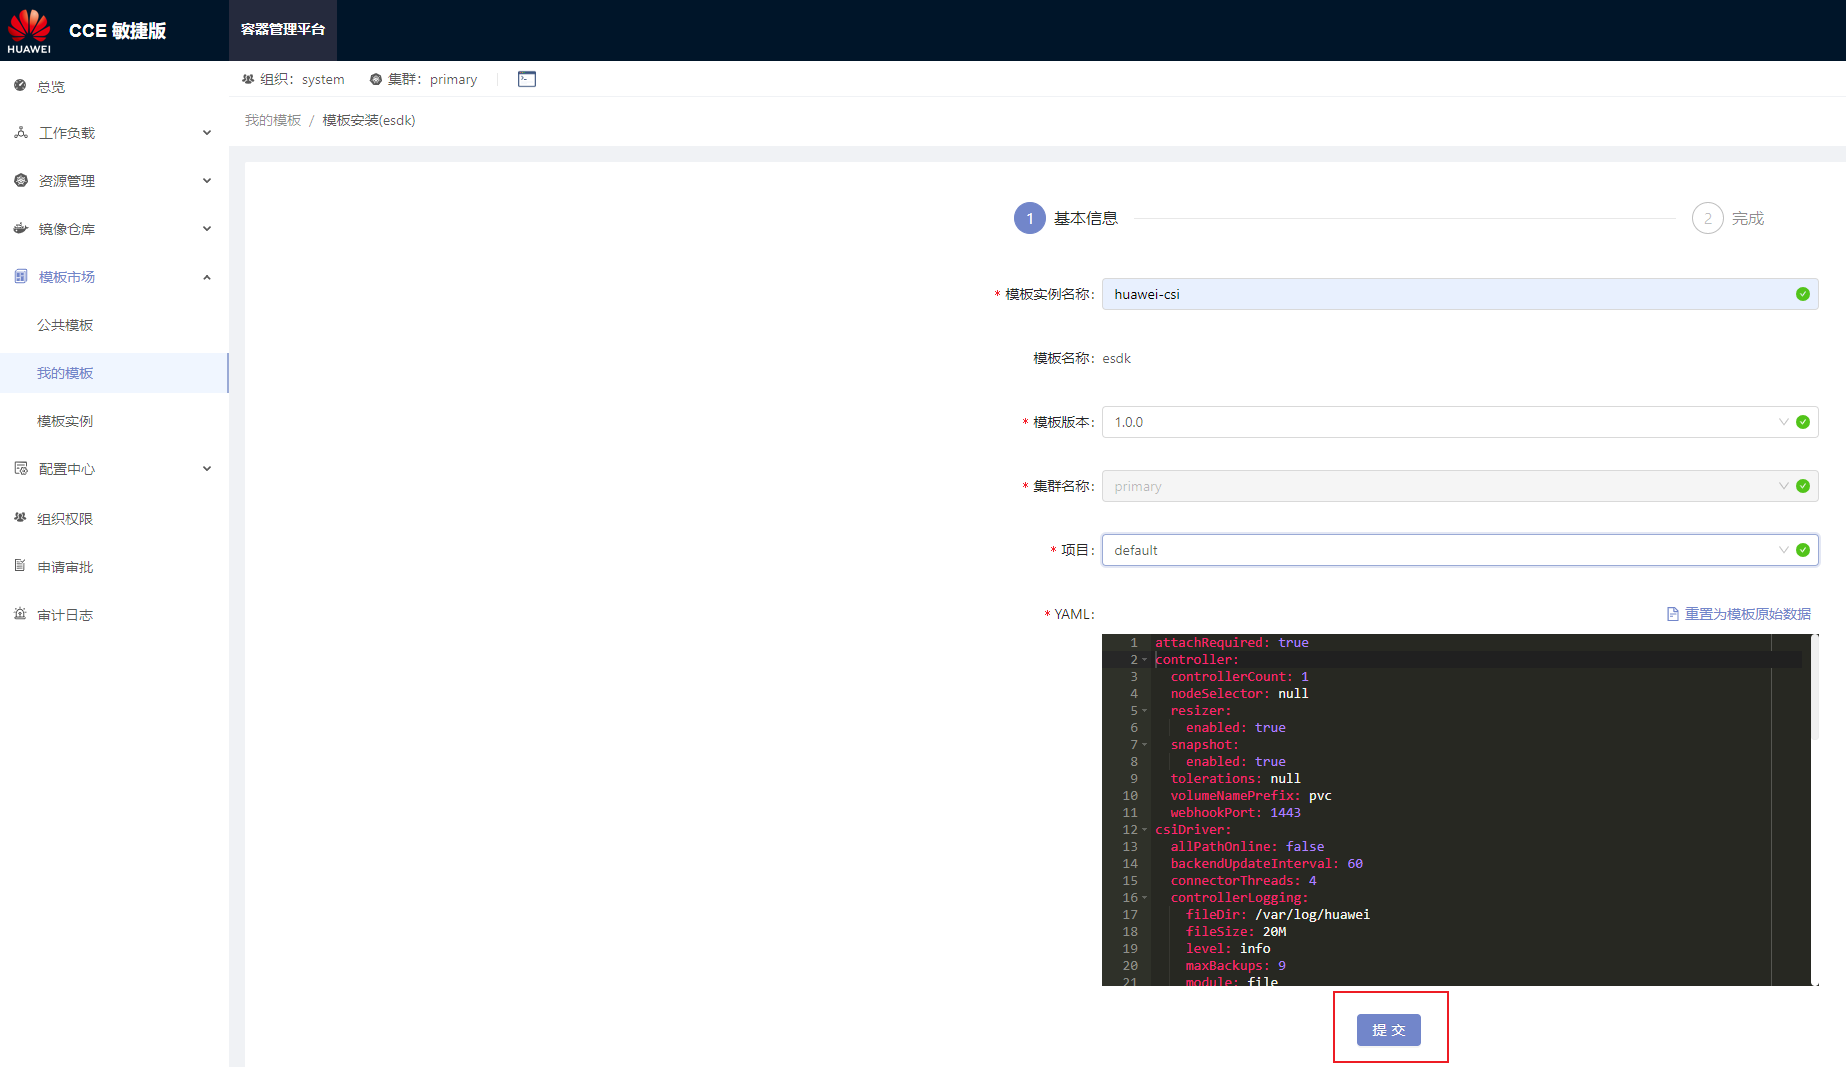
After the installation package is uploaded, choose Charts > My Charts. On the My Charts page that is displayed, choose Install > Submit. The chart release name can be customized.

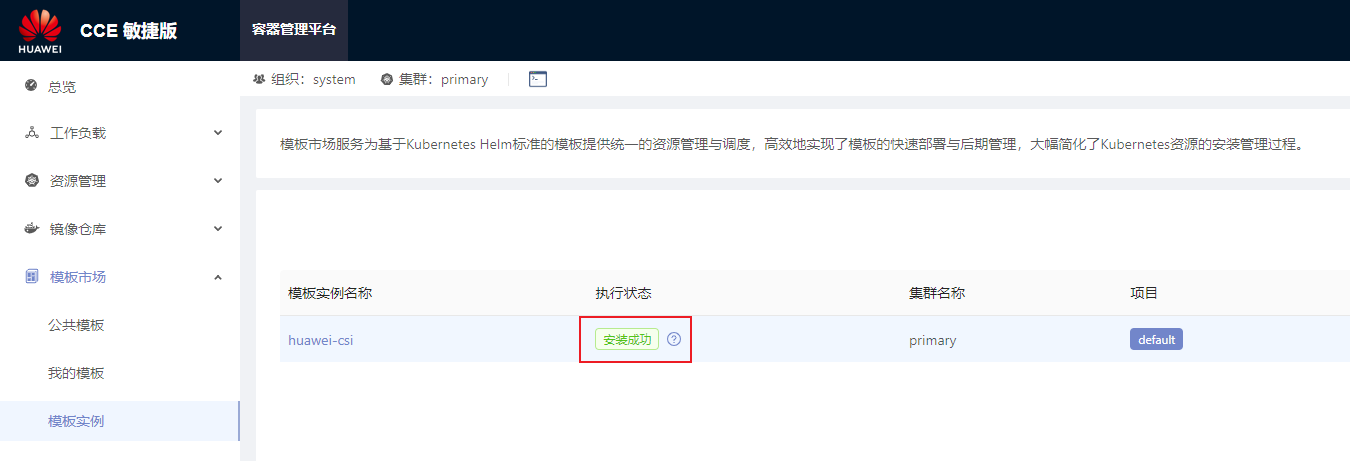
On the home page, choose Charts > Releases and select the project specified during installation (for example, default in the following figure). After the installation is successful, Installed is displayed in the Status column.
